跨境独立站开店
Key points when creating your first Shopify Theme Section
This time, we'll explain how to create a Theme Section for Shopify developers.

This time, we'll explain how to create a Theme Section for Shopify developers.
For clients who want to customize their storefront, offer them creative ways to manage it. Shopify's sectioning feature allows for powerful personalization of Shopify themes, so by referring to best practices and utilizing them to enhance effectiveness, you can offer your clients a variety of options.
Whether you're creating a Shopify theme from scratch or modifying an existing one for a client, you'll need different types of sections, and their content will vary depending on the context. Furthermore, customers expect a user-friendly and intuitive experience, so having the right sections in the right places significantly impacts conversions.
This article will cover how to create various types of theme sections and the rules for their use. Let's help clients customize their stores. We'll also look at some sections from the source-available theme "Dawn" to see how sections can be used in realistic scenarios.
What are Theme Sections?
Broadly speaking, sections are modular components of a Shopify theme that merchants can customize. Sections contain content and settings for specific areas of your Shopify store, such as basic elements for product pages or slideshow components.
Within these sections, developers can work with a variety of setting types, such as text inputs, image pickers, custom HTML, and menus, which merchants can then customize in the theme editor to fit their own content.
Sections are located in the `/sections` directory within your theme directory. You can statically include them in your theme's layout files, such as headers and footers, or dynamically add them to templates using the theme editor. To get a general idea of the variety of components that can be used as sections, see the `/sections` directory in Dawn.
With the launch of Online Store 2.0, sections are now available as a way to organize all aspects of your theme, from entire pages to individual elements. As we'll cover in this article, the ability to add sections to JSON templates makes it easy to arrange various pages and further enhances the theme when merchants customize it themselves.
About templates and sections
To learn about the functionality of sections in Shopify themes, you need to understand Shopify's Theme templates system. In Online Store 2.0, individual page types can be represented as .json files in the theme's /templates directory. Developers can build these page types by defining which sections to display by default in the JSON template file.
These JSON templates do not contain markup or Liquid objects for displaying store content. They are simply data files that indicate which sections will appear on the page and in what order.
A basic example of a product.json template file is shown below.
In this example, the product page is rendered in a section called main-product.liquid, and by default, only this section is displayed. When a merchant customizes this page and adds sections, the product.json template file will be updated with this information. We will revisit this process in more detail later in this article when we look at how to include sections in a template.
Section Foundations
When developing a theme using sections and JSON templates, you might consider dividing your section files into two distinct categories: the main page section and individual module components.
Main page section
The main page section should contain all the default content for that page. For example, the main section of a product page might include the product title, description, media, price, and the "Add to Cart" form, along with their associated properties.
Depending on the page template containing the section, you can also access Liquid variables and objects within the section. For example, a section rendered in the `product.json` template file can access any attribute of the `product` Liquid object, which represents the product on the rendered page.
Similarly, sections in the collection.json file can access attributes of the Liquid object collection. All sections, regardless of where they appear, can access the Liquid global object.
In addition to page-specific Liquid objects and markup that you add to the main page section, you can also create settings using {% schema %} tags. These can reference elements within the section and can also be configured by merchants in the theme editor.
The main page section contains markup that specifies the page type, so it should only be inserted within the relevant template. To prevent it from being added to other page types in the theme editor, do not include "presets" in the section schema.
To see an example of a main page section, refer to the main-product.liquid file in the /sections directory of Dawn, or to any section whose title prefix is "main". As a general rule, you should include "main" in the title of main page sections to distinguish them from other sections.
Module section
These sections are more commonly added by merchants in the theme editor than included by default in page templates. To add a section to a page in the editor, the schema must include presets. If presets are included, the section will appear as an option when the merchant clicks "Add Section" in the theme editor.
In contrast to the "main" page section, the module section contains content and markup that are reused across different contexts and page types within your Shopify store. Therefore, developers should be careful not to rely on Liquid objects that identify pages in these sections.
On the other hand, you can also use the templates attribute within the section schema to restrict a section to only specific page types. For example, if you want to limit it to product pages and collection pages only, add the following line to the schema tag of that section.
"templates": ["product", "collection"]
The `templates` attribute accepts a list of strings representing page types.
Depending on the features you want to include in your theme, or the requirements specified by your client, you can create a variety of sections that provide their own unique functionality. For examples of module sections, see the newsletter section or rich-text section used in Dawn.
Section settings
We briefly touched on setting up section files to create customization options that merchants can use, but let's take a closer look at how to configure them.
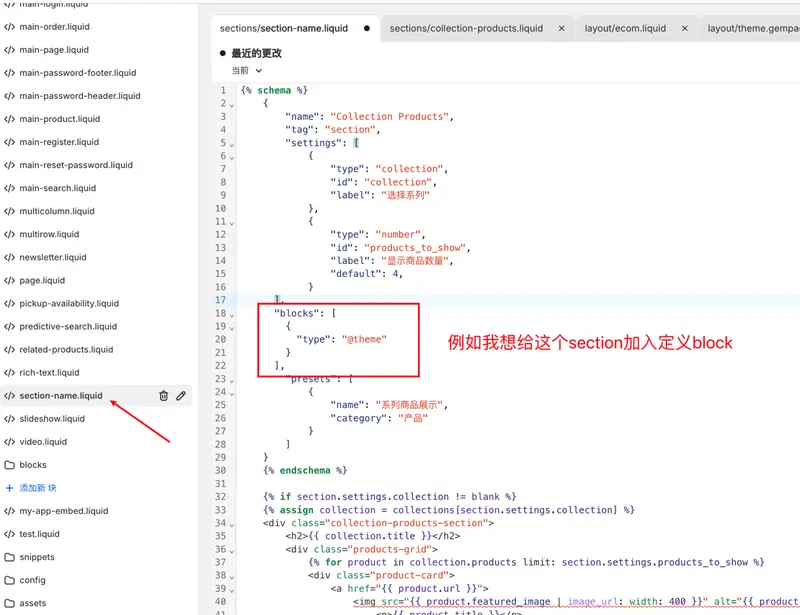
As we have seen so far, the settings are contained within the {% schema %} tag of the section file and are rendered in the theme editor UI. A simple example in a custom text section is shown below.
In this example, you can see two HTML elements: a heading and a paragraph. These elements contain dynamic content created with the Liquid object's section.settings. This section object allows you to retrieve the setting values by referencing their unique IDs.
Below the HTML and Liquid markup, you'll find the settings for this section within the {% schema %} tag. Each setting is represented as an object, where you can define its ID, type, and how it appears in the editor. To access Liquid's section settings, add an ID to the Liquid object `section.settings`. Here you also define the type and how it appears in the theme editor.
The following is what is included in the schema tag settings.
- id: Defined Liquid variable
- type: Type of output to create
- label: Context displayed in the theme editor
- default: Default value
In this example, we created a text box for headings and a richtext box for paragraphs, but you can add a variety of output types to suit your client's requirements. Other valid input types include image_picker, radio, video_url, and font_picker.
This example already has a valid section, but it's missing a crucial point: it doesn't precisely define where the section will appear in the theme. We'll look at a few ways to insert sections later, but for now, we'll create presets for the section so that we can add sections to any page from the theme editor.
The presets are the default components of a section and are added within the {% schema %} tag. Here is a simple example.
kokoyo"presets": [{"name": "custom-text","category": "Custom"}]kokoyo
When reflected in the example code, the custom text-box section will look like this:
Now, when you select "Add Section" on any page in the theme editor, this section will appear as an available option. The settings for the section you created will be displayed in the right sidebar with the added label and default text, and you will also be able to enter text into the input text settings that should appear in the section.
This is a simple example illustrating the relationship between section settings and the variables you can create within a section. It also shows how they are rendered in the theme editor. For more advanced models, see the rich text section in Dawn.
How to insert a section within a page
As already mentioned, there are several ways to add sections within a theme page. Let's look at each approach individually, and at the same time, we'll review the rules that should apply.
1. Insert sections into the JSON template.
As we saw in the main page section, a JSON template file can receive a "main" property, which will be the default section for that page type, and this should contain all the important content for that page.
In addition to the "main" section, you can also include other sections that are displayed by default in your JSON template. For example, in a product JSON template, you can insert a "Recommended Products" section by adding a new object below the "main" section.
In this example, the section is named "recommendations," and the "type" property is used to specify which files in the "/sections" directory to insert.
Because this JSON template references one or more sections, you need to define the display order of the sections using the `order` object. Each section included in the JSON template has a predetermined order, but merchants can rearrange the sections in the theme editor.
If a section added to a JSON template does not contain presets, that section cannot be removed from the theme editor. However, sections that are not needed by the merchant can be hidden. For a real-world example of arranging sections in a JSON template, check out the Dawn product template.
2. Include a section as an option on every page.
I checked the custom text section, and if you have presets in your schema settings, that section will be available on all pages of the theme.
"presets": [{"name": "custom-text","category": "Custom"}]
This approach allows you to add, rearrange, and delete sections from the theme editor. You can also restrict section usage to specific pages using the `templates` property.
Thanks to this drag-and-drop functionality, you can offer a variety of options for personalizing your store when custom building dynamic sections. You can create movable sections such as videos, products, and image galleries. For an example of a section created this way, see Dawn's newsletter section.
3. Use the {% section %} tag to add a static section.
Liquid's `section` tag allows you to render sections from the `/sections` directory within a layout or template file. This tag is used as follows:
{% section 'header' %}
Sections added using the `<section>` tag cannot be moved, rearranged, or hidden in the theme editor. Their position on the page is fixed, depending on where they were added in the layout or template file.
This approach is most common for content and components that are always displayed, such as headers, footers, and announcements sections. To see this in the Dawn example, take a look at the theme.liquid file. Static header, footer, and announcement sections are inserted using section tags.
Unleash the power of creativity
We've now seen how to add sections within a theme. You can see that this allows you to build endless options for your client's store.
Using JSON templates allows you to leverage sections across all pages in your theme, enabling merchants to create the store exactly as they envision it. Your advice will make it even more successful.
Original text by Liam Griffin, translated by Nozomi Fukatsu
Share this article
- Share on Facebook
- Share on X
- Share on LinkedIn